The first step was to clean up the space vacuuming out the debris and dust. Then removing the knobs tubes and any wires left from replacing the knob and tube wiring. 
R-13 insulation was rolled out in the space to be floored. As usual I over estimated and insulated two bedrooms in one go. This will pay off later when the rest of the attic is insulated for winter.
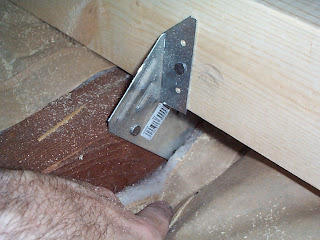
The framing for the floor was done in 1x3s laid crosswise to the ceiling joists and held in place with hurricane brackets. This time the braces were U shaped with a flange for use on the lower rafter near the eaves. These worked much better than the ones used in the lower attic (a sort of ¼ twist of flat steel.)
The plywood sheeting was the same 7/16 OSB panels but were sawed length wise into 24x48s to get them up the stairs and up through the access panel. Placing them crosswise to the top layer of framing made a much stronger and less springy floor than in the lower attic. Again, the sheets were placed shiny side up to make a smoother floor although the makings had to be sanded off since the ink rubs off and will not wash out of cloths.
Near the access panel, the framing stops make a small step. The electrical outlets for the attic placed near the access panel for practical reasons.


No comments:
Post a Comment